Earwax (cerumen) protects the skin of your ear canal and helps prevent infection. Most ears are self‑cleaning, but wax can build up and cause a clogged sensation, muffled hearing, itching, or even dizziness. If you’re wondering whether what you’re feeling is wax or something else, start with this primer on earwax buildup, symptoms, and safe removal.
From the clinic: I see patients every week who’ve tried multiple products without a plan. The best results come from choosing the right type of drop, using it correctly for several days, and knowing when to stop and get professional help.
How Earwax Removal Drops Work
Earwax removal drops soften and loosen hardened wax so it can either migrate out naturally or be rinsed away with gentle irrigation. Ingredients fall into a few categories:
| Ingredient | How it works | Best for | Notes |
|---|---|---|---|
| Carbamide peroxide | Releases micro‑bubbles that break down wax. | Firm, impacted wax | Often used for 3–5 days before irrigation. |
| Hydrogen peroxide (3%) | Mild fizzing loosens debris. | Occasional buildup | Can dry the canal if overused. |
| Mineral or olive oil | Lubricates and softens for natural migration. | Sensitive ears, maintenance | Gentle but slower acting. |
| Saline or water‑based drops | Moistens wax; aids gentle rinse‑out. | Mild debris, routine care | Least irritating; good for kids and dry canals. |
If you’ve noticed unusual odor or discoloration while using drops, review what the colors can mean in Earwax Colors Explained and when to evaluate for infection.
Your At‑Home Roadmap (What I Recommend)
- Confirm it’s likely wax. A gradual, “full” feeling with muffled hearing commonly points to cerumen. Sudden hearing loss, severe pain, or drainage needs medical evaluation—don’t irrigate. For red flags, see the When to Stop & See a Professional section below.
- Choose the right type of drop. For firm wax, start with carbamide peroxide. For sensitive ears or children, begin with oil or saline.
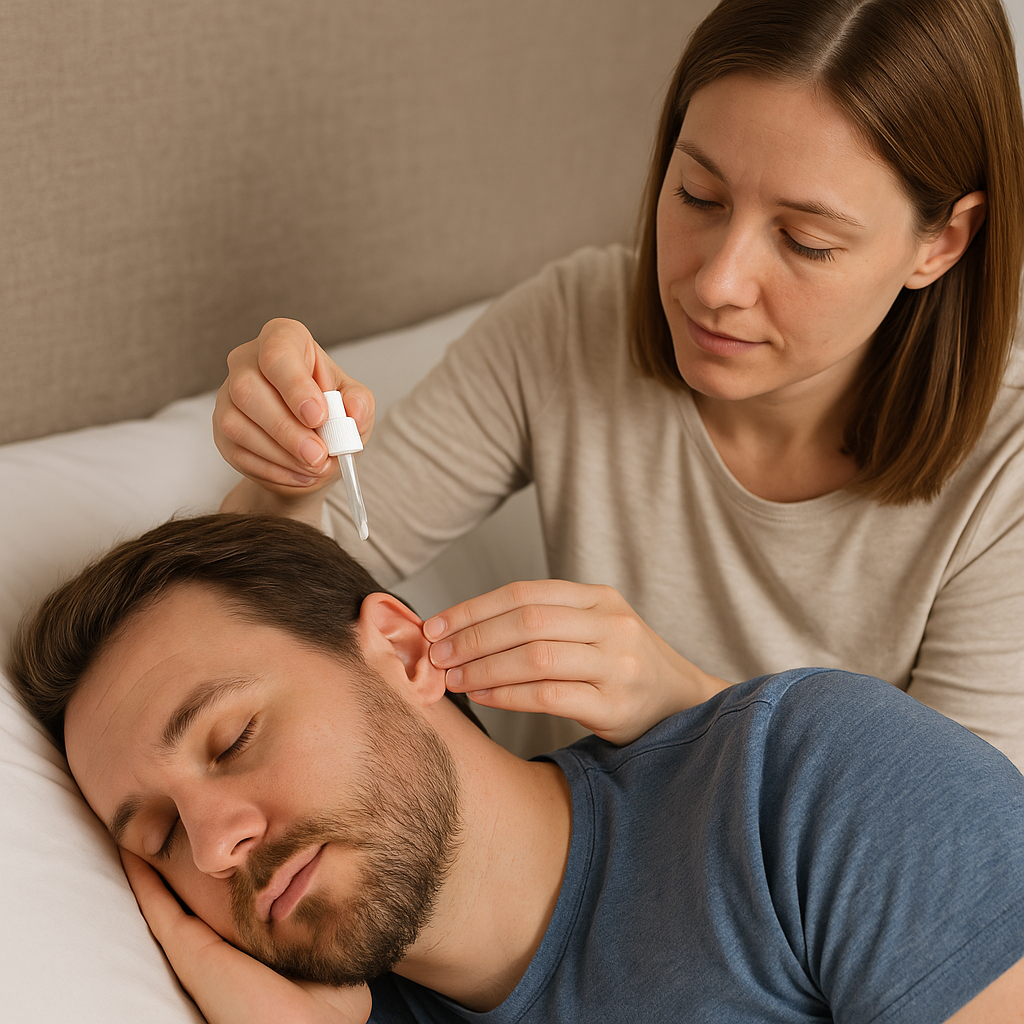
- Use drops correctly for 3–5 days. Lie on your side, instill drops, remain still 5–10 minutes, then let them drain onto a tissue.
- Consider gentle irrigation after softening, using a bulb syringe or bottle washer on low pressure with body‑temperature water.
- Pause and reassess. If the ear still feels blocked after several days—or symptoms worsen—stop home treatment and book professional removal.
Before you start, skim our practical do’s and don’ts in How to Safely Clean Your Ears (and What to Avoid) so you don’t undo your progress with cotton swabs or high‑pressure sprays.
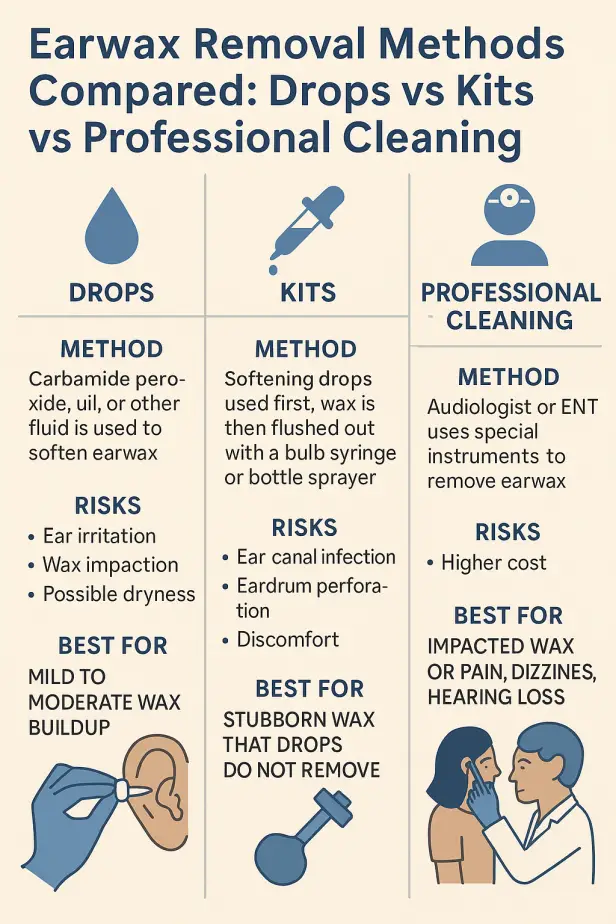
Best Earwax Removal Kits (and When to Use Them)
“Kits” pair softening drops with a bulb syringe or spray bottle for irrigation. They work best after wax is softened:
| Method | Works best for | Pros | Watch‑outs |
|---|---|---|---|
| Drops only | Mild buildup, sensitive canals | Gentle, inexpensive | May be too slow for impacted wax |
| Drops + bulb syringe | Moderate, softened wax | Simple and effective at home | Too much squeeze pressure can cause pain |
| Drops + bottle washer | Recurrent, stubborn wax | Consistent, directed stream | Use low pressure; warm water only |
Visual learner? Many readers like adding our infographic mid‑article to compare drops, kits, and professional cleaning at a glance.
Best Options by Situation
Kids
Favor oil or saline. Avoid irrigation unless a pediatric clinician advises it. If your child swims frequently and develops itchiness, rule out swimmer’s ear; in those cases, drops for wax aren’t helpful. The step‑by‑step technique in safe ear cleaning is a good place to start.
Seniors
Wax tends to be drier with age. A short course of carbamide peroxide followed by gentle irrigation usually works well. If you’ve had ear surgery or tubes, skip DIY irrigation and schedule professional care.
Hearing Aid Users
Devices can trap wax and shift it deeper. Consistent prevention—such as a few drops of mineral oil once weekly—reduces clogs and feedback. If you notice irritation under molds or domes, review our guide to ear infections from hearing aids and consider a professional cleaning cadence (every 6–12 months).
Sensitive Ears or Dry Canals
Oil or saline is typically more comfortable than peroxide‑based drops. If you experience burning or stinging, stop and reassess.
Step‑by‑Step: Using Drops Safely
- Lie on your side with the affected ear up.
- Instill the labeled number of drops.
- Stay in place for 5–10 minutes; gently tug the outer ear to help drops reach deeper wax.
- Sit up and let the fluid drain onto a tissue.
- Repeat 1–2 times daily for up to 4–5 days.
- After softening, flush gently with body‑temperature water if advised. Never aim the stream directly at the eardrum.
If you notice a foul smell, pain, or persistent wetness after irrigation, review why earwax can smell bad and stop home treatment until you’re examined.
How to Irrigate Your Ears at Home
After using drops for 3–5 days to soften earwax, you may try irrigation to gently flush loosened wax from the canal. One of the most effective and widely used tools is the Elephant Ear Washer Bottle System, which is similar to what many clinics use.
Step-by-Step Irrigation Instructions
- Prepare body-temperature water. The water should feel neither hot nor cold to the touch. Using water that is too hot or too cold can trigger the balance organs in the inner ear and cause temporary vertigo (a spinning sensation).
- Fill the Elephant Ear washer bottle with the prepared water. Attach the soft irrigation tip securely.
- Tilt your head over a sink or basin with the affected ear facing down.
- Insert the tip gently into the ear canal opening (do not push deeply).
- Squeeze the bottle slowly to direct a steady, low-pressure stream of water along the wall of the ear canal—not directly at the eardrum.
- Allow the water and wax to drain naturally into the sink. You may need to repeat the process several times.
- Dry the ear canal by tilting your head and gently blotting the outer ear with a towel.
Important Safety Notes
- Always soften wax with drops before irrigating—flushing hard wax can cause pain.
- Never use high water pressure, which risks injury.
- Stop immediately if you feel sharp pain, dizziness, or see blood in the drainage.
- Do not irrigate if you have a history of ear surgery, eardrum perforation, or recurring ear infections.
If irrigation does not clear the blockage, stop home treatment and see an audiologist for professional removal. Repeated unsuccessful attempts can push wax deeper and increase the risk of infection.
Ear Irrigation Options Compared
There are different ways to irrigate the ear canal. Each has advantages and limitations. Here’s how the most common methods compare:
| Method | Best For | Pros | Cons / Risks |
|---|---|---|---|
| Bulb Syringe | Occasional, mild wax buildup after softening | Inexpensive, widely available, simple to use | Limited water pressure; risk of squeezing too hard; less effective for stubborn wax |
| Elephant Ear Washer | Moderate to stubborn wax after several days of drops | Steady water flow; similar to tools used in clinics; reusable and durable | Requires prep and careful technique; too hot or cold water may cause temporary vertigo |
| Professional Irrigation | Recurring, severe, or impacted wax; ears with medical history | Done under magnification; safest and most effective; combined with suction or curettes if needed | Requires an appointment; higher cost than at-home methods |
Tip: No matter which method you choose, always use body-temperature water to prevent dizziness, and stop immediately if you feel pain or pressure.
Common Pitfalls & Myths
- Cotton swabs push wax deeper and can injure the eardrum.
- Ear candling does not remove wax and increases burn and blockage risk.
- High‑pressure flushing can cause pain, dizziness, or eardrum perforation—keep pressure low and water warm.
- Overusing peroxide dries the canal and may worsen itching.
When to Stop & See a Professional
DIY isn’t the right choice if you have:
- Severe pain, drainage, fever, or a sudden drop in hearing
- A known or suspected perforated eardrum or prior ear surgery
- Recurring blockages despite proper use of drops and irrigation
- Persistent dizziness or foul odor after treatment
Professionals use magnification, suction, curettes, and controlled irrigation to remove wax safely. If you’ve been cycling through products for weeks, booking a visit saves time and reduces complications.
Prevention: Keep Ears Clear Without Over‑Cleaning
- For “waxy” ears, use 1–2 drops of mineral oil weekly.
- Dry the outer ear after showers; avoid inserting objects into the canal.
- If you’re curious about your wax type, the overview in Earwax Colors Explained can help tailor your routine.
Frequently Asked Questions
- How long should I use earwax drops before trying irrigation?
- Most people need 3–5 days of softening before a gentle rinse works well. If you’re still blocked after that window, stop DIY care and schedule a professional cleaning.
- Are earwax drops safe for children?
- Oil or saline is usually best for kids. Avoid irrigation unless your pediatric clinician recommends it for your child’s specific situation.
- Can I use earwax drops if I wear hearing aids?
- Yes—when the aids are out. Let ears dry completely before reinserting devices to prevent moisture‑related irritation.
- Do ear candles remove wax?
- No. Studies show they do not remove wax and can cause burns, blockages, and eardrum injuries.
- What if earwax smells bad?
- An unpleasant odor can signal infection or trapped water. Pause home treatment, keep the ear dry, and review this guide to earwax odor before seeking care.